Most people overcomplicate their tech stack.
They spend weeks researching tools. They hire expensive consultants. They procrastinate because "IT is hard."
Stop.
If you are running a business in 2026, you need exactly two things to start:
- An offer people want.
- A professional way to communicate.
Sending invoices from coolguy88@gmail.com is costing you money. It signals "hobbyist," not "professional."
Setting up Google Workspace takes 15 minutes. It costs less than two coffees a month.
TL;DR:
- Buy Domain.
- Sign up for a Google Workspace account.
- Verify via DNS.
- Update MX Records.
- Apply Promo Code.
Here is the exact, zero-fluff playbook to setting up Google Workspace in 2026.
Phase 1: Buy a domain name
Most people get stuck because they do things out of order.
1. Buy your domain.
Don’t overthink the name. If your preferred name is taken, add a prefix (get, try, use) or a suffix (hq, app, io).
- Go to a registrar (Namecheap, GoDaddy, or Google Domains).
- Buy the URL.
- Keep that tab open.
2. Choose your edition.
For 99% of solopreneurs and small businesses, Business Starter and Business Standard is enough. You get:
- Custom email.
- 30GB storage.
- Security.
Do not upgrade to Enterprise until you have a team that actually needs it.
Phase 2: Create a Google Workspace account
This is where people get scared. They see "DNS" and panic. Don't panic. It’s just copy-and-paste.
Step 1: Create your account
Go to the Google Workspace signup page.
- Enter your business name.
- Select the number of employees (Just you? Select "Just me").
- Select your region.
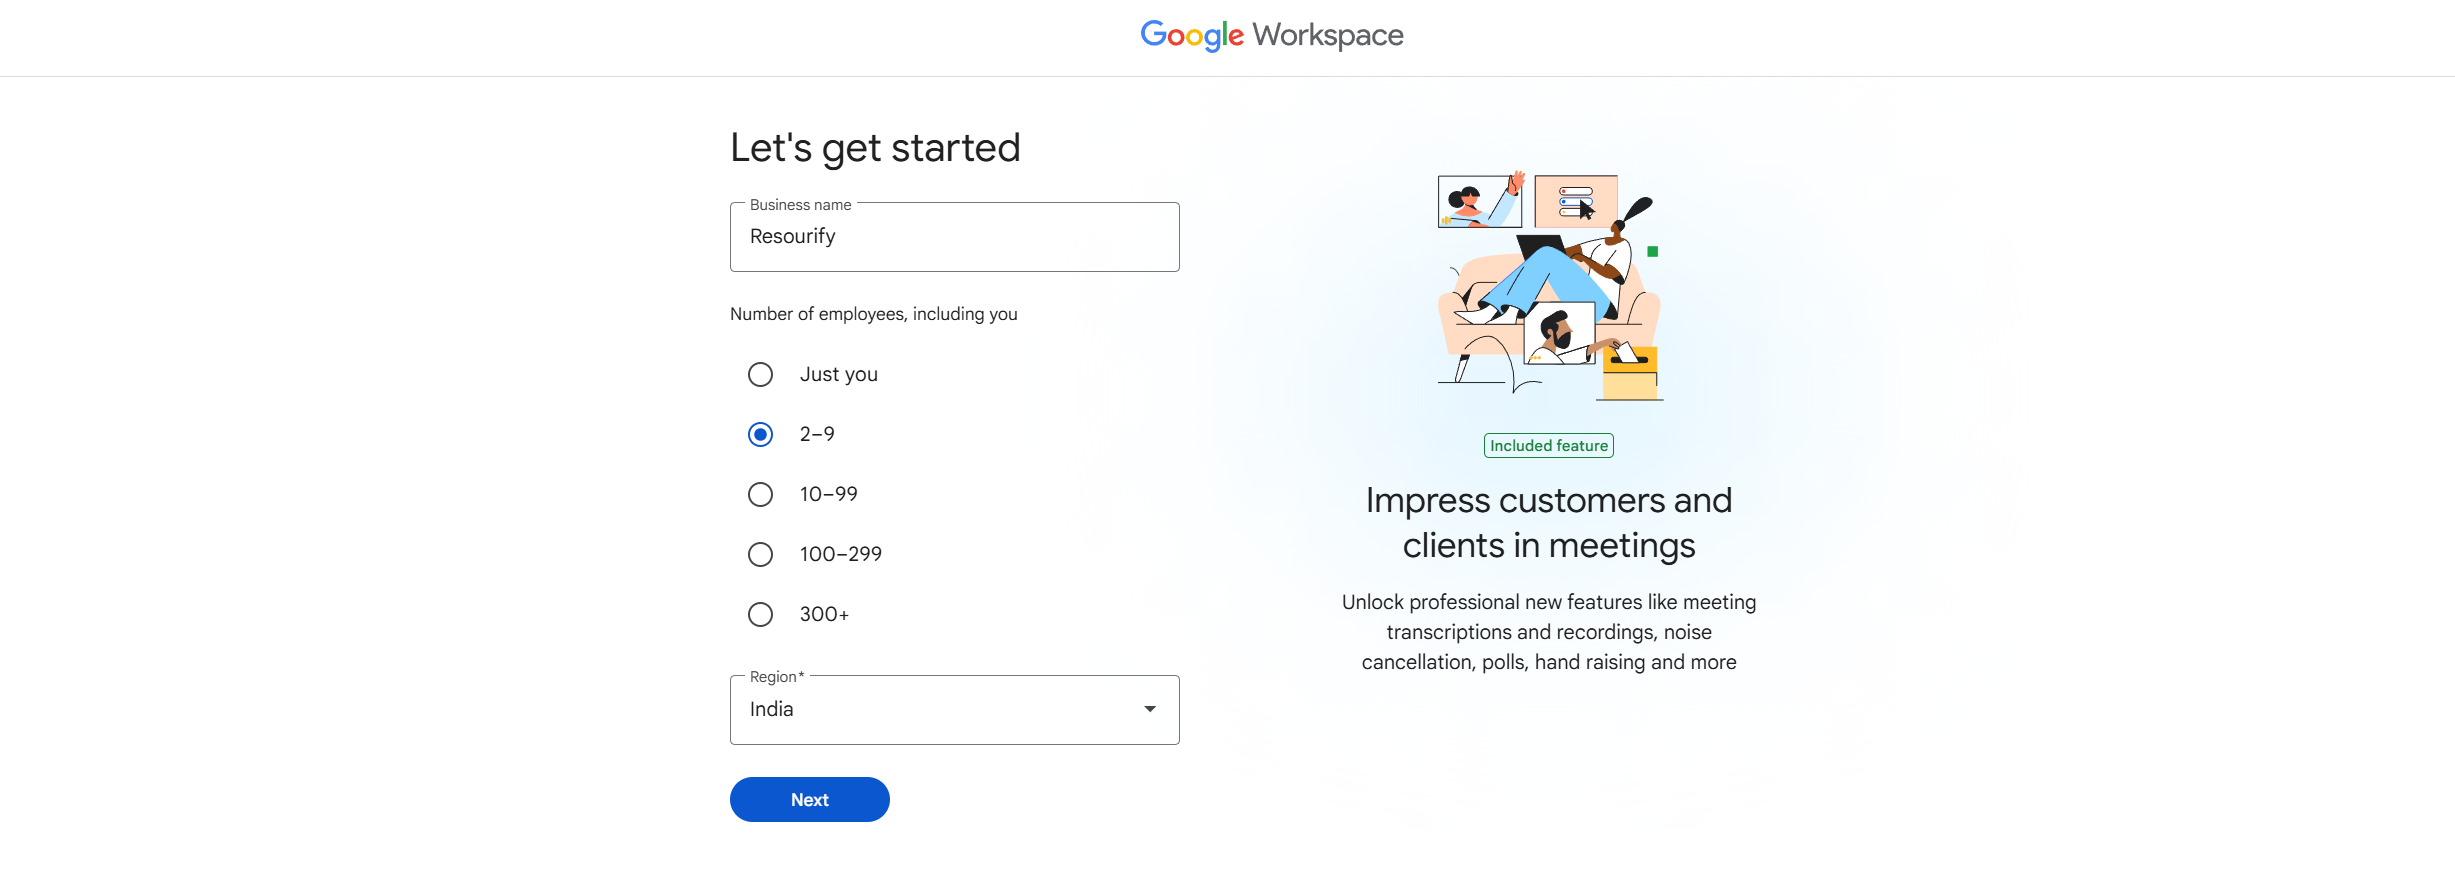
- Enter your current email and contact info in next page.

Step 2: Connect your domain
Google will ask: "Choose a way to set up your account"
- Click Set up using your existing domain.
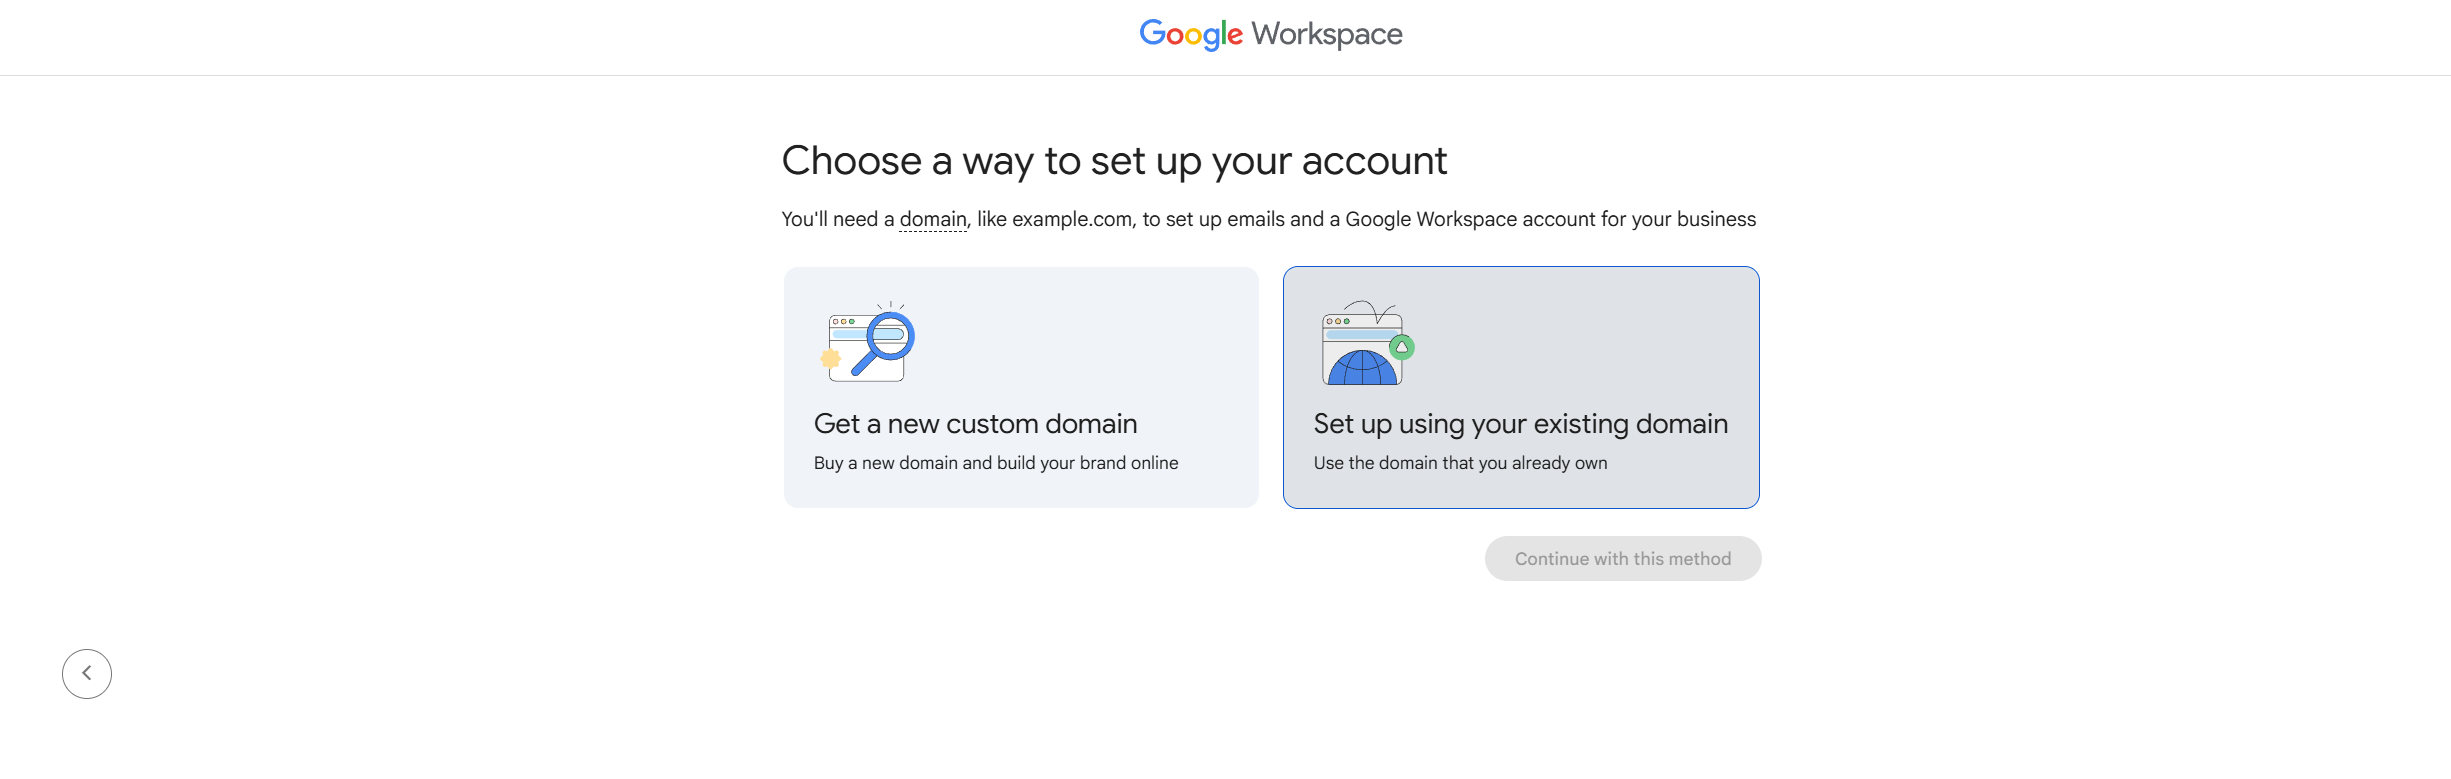
- Type in the domain you bought in Phase 1.

Step 3: Create your user
This is your master admin account.
- Format: name@yourdomain.com or hello@yourdomain.com.
- Pro tip: Avoid admin@. It attracts spam bots. Use your first name.
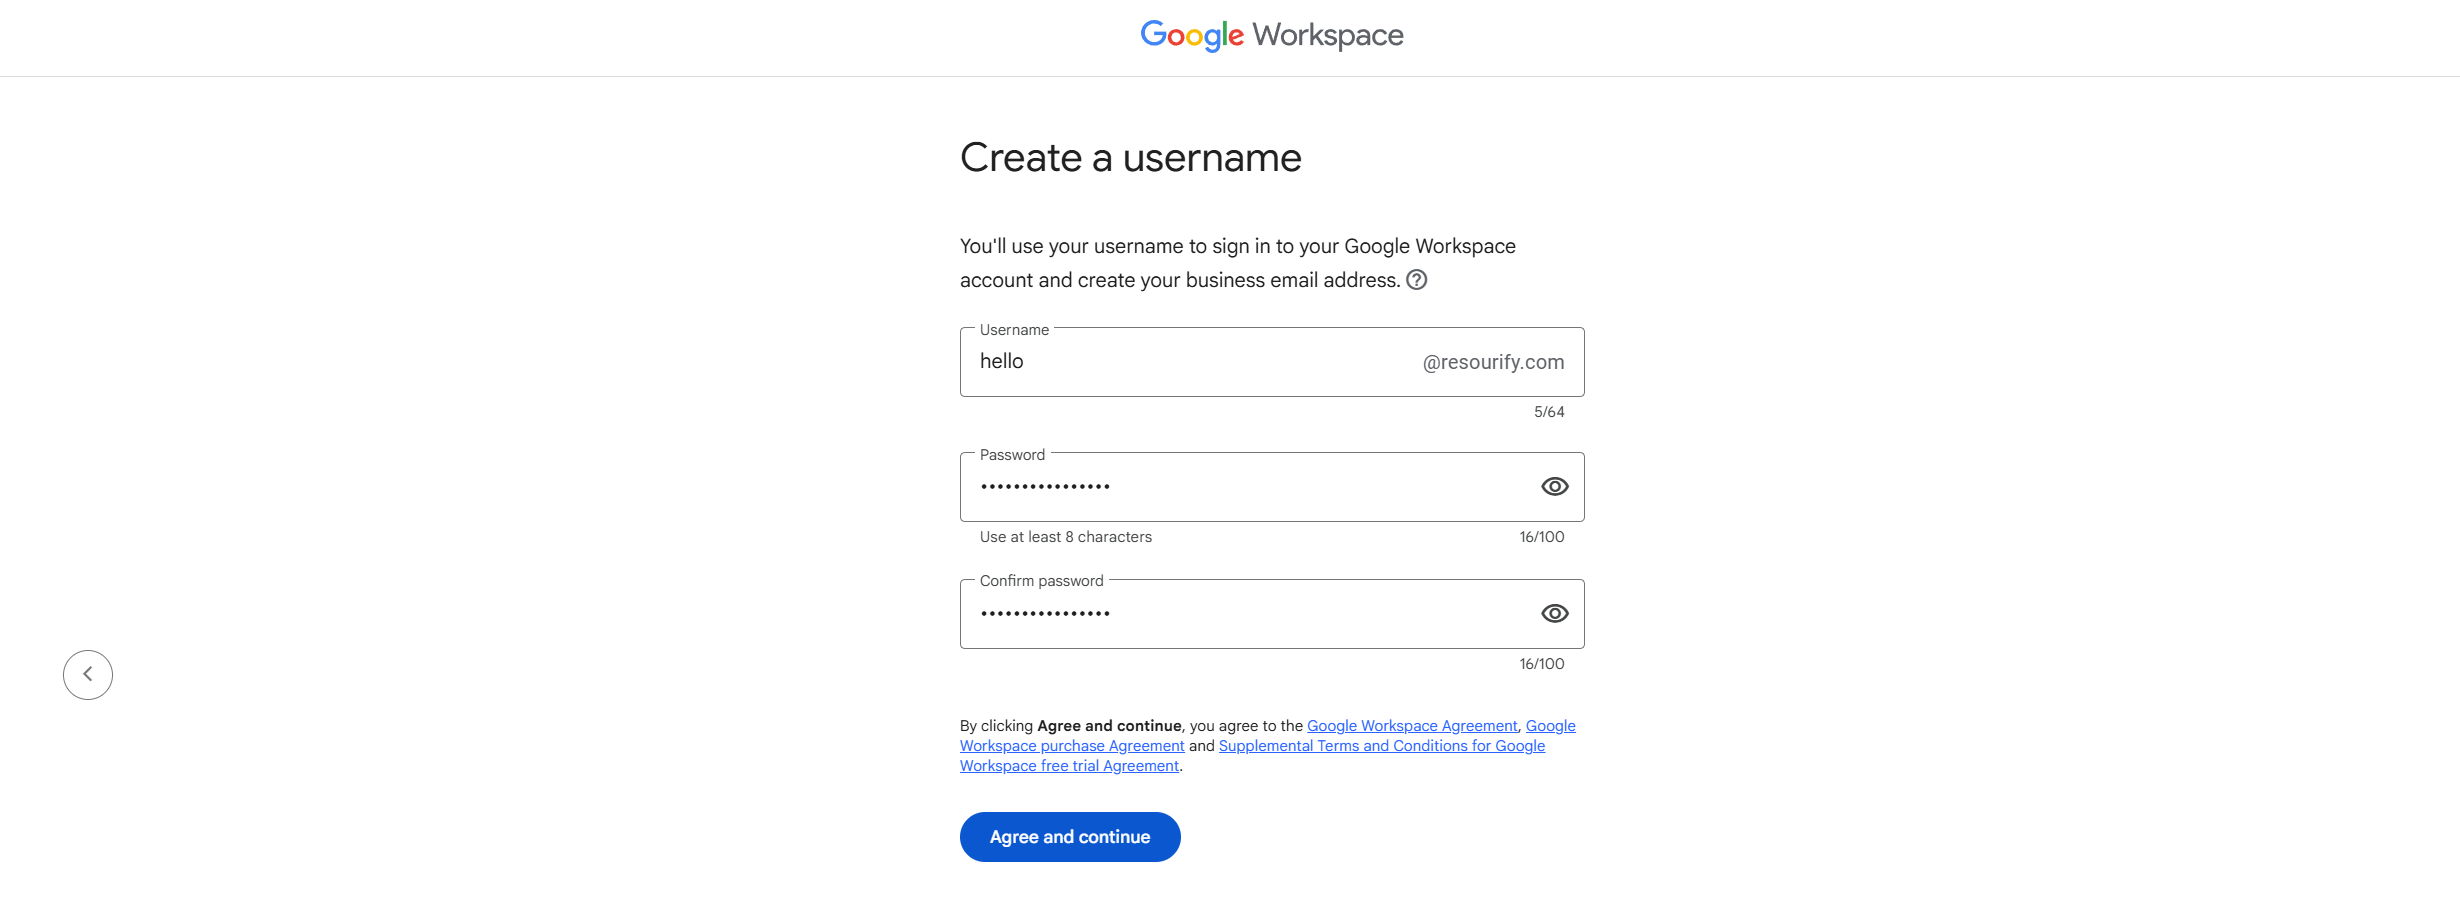
After this, You may need to login again using email and password you just created in Step 3.
Accept the Welcome screen terms.

Step 4: Select a plan
Choose your preferred Google Workspace plan.
Grab a promo code from our homepage and apply it to "Promo code" section to save flat 10% for 12 months.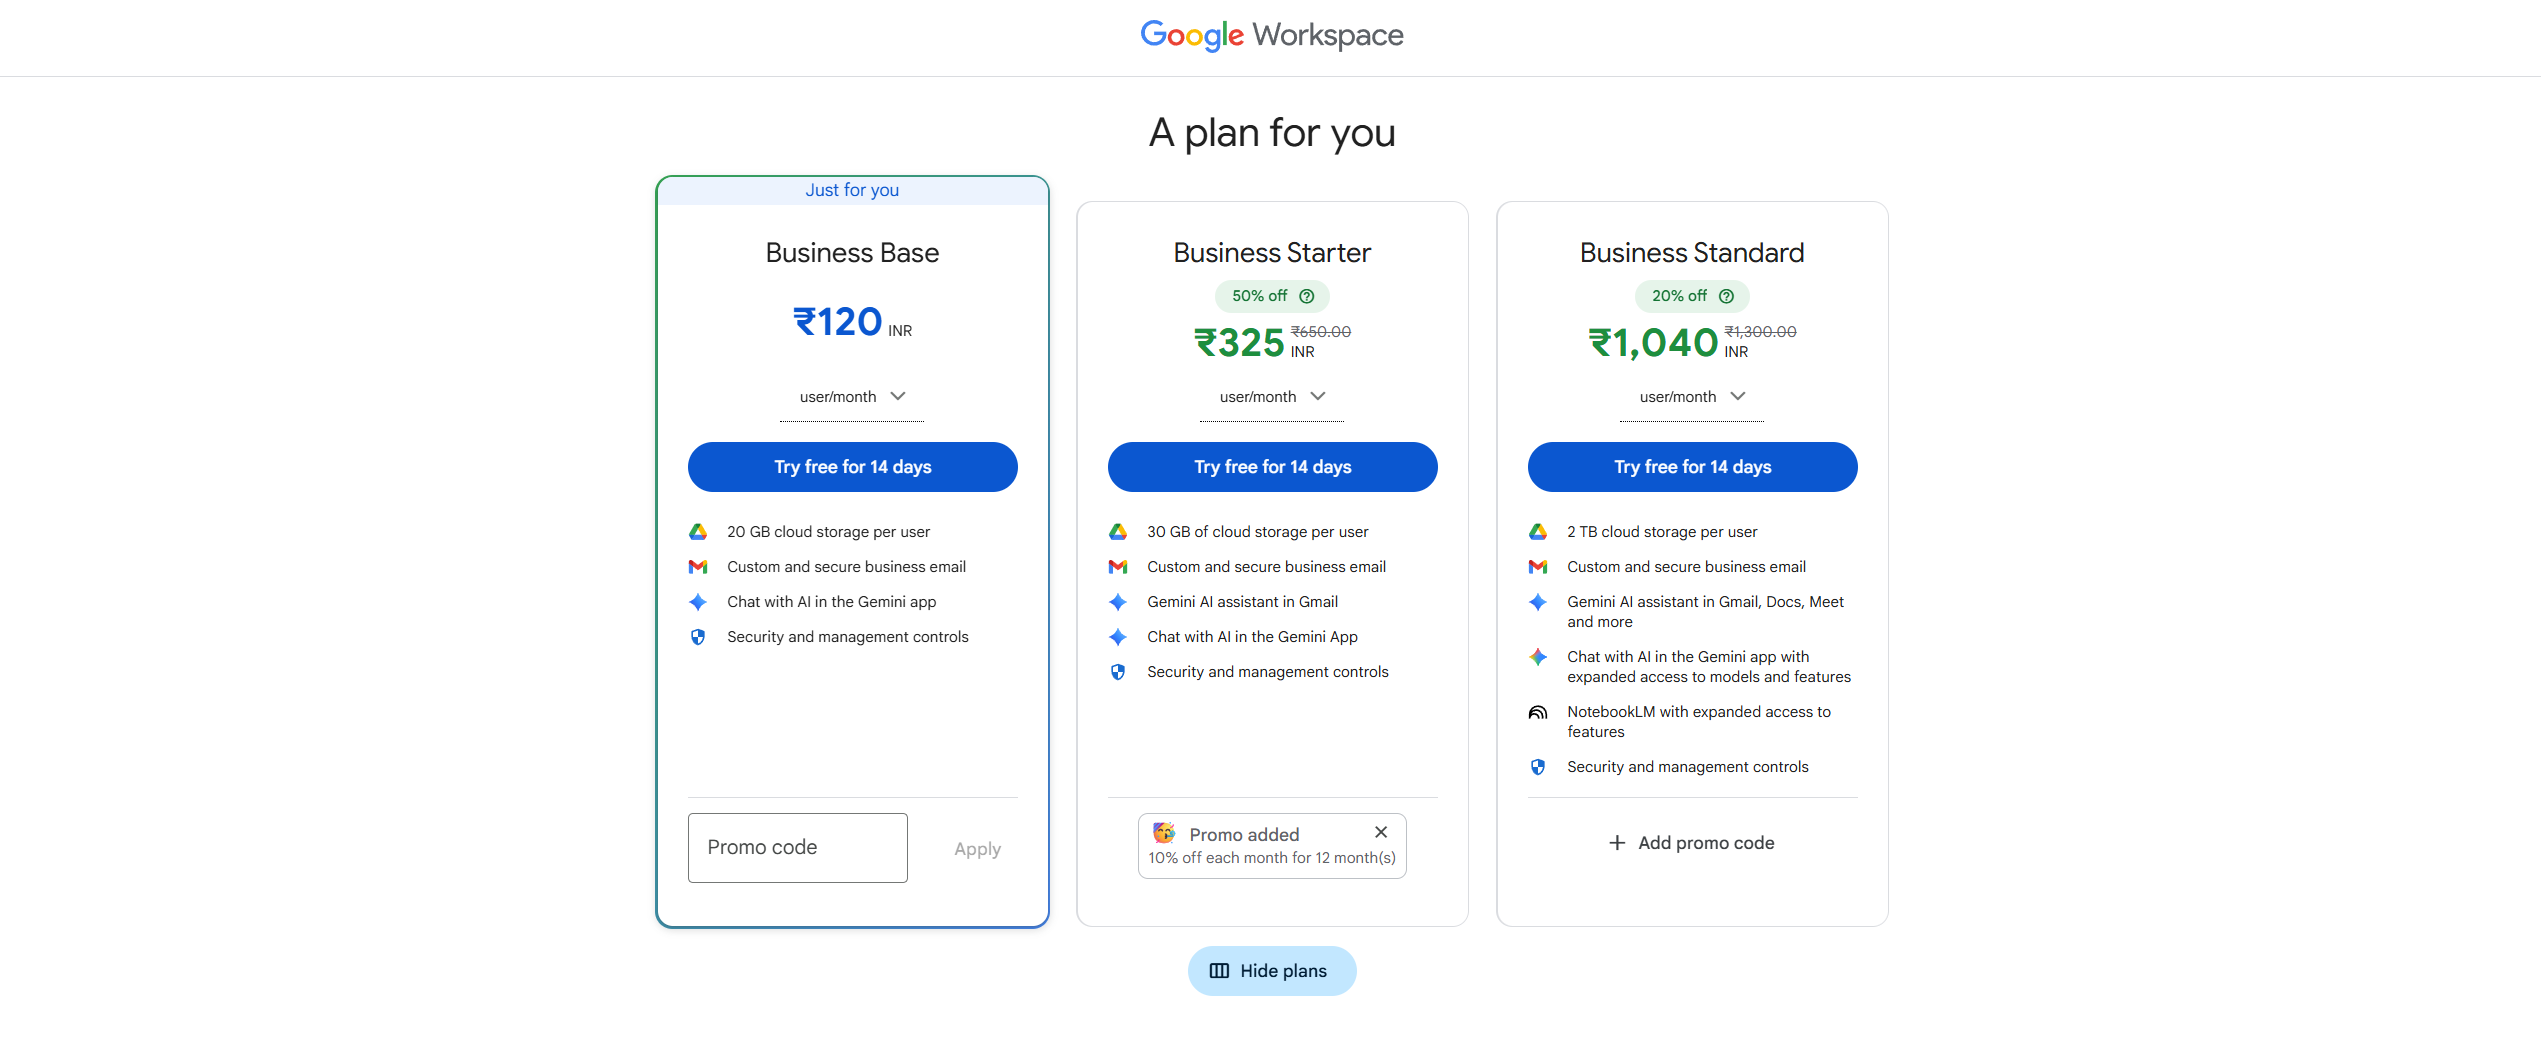
Starter and Standard plan works for most soloprenuers and small businesses.
Step 5: Review and checkout
On review page, check your selected plan and fill following details:
- Contact information
- Preferred payment method

Phase 3: Verify your domain
Google needs to know you actually own the domain. In 2026, this is automated for most registrars.
Hit "Get started" button.

Verify your domain automatically:
- Select your domain host from the list.
- Log into your domain registrar.
- Click "Connect."
- You are done.
If your domain host in not on the list:
You have to do it manually (TXT Record)
- Select "My domain uses a different host".
- Google will give you a long code (TXT record). Copy it.
- Go to your Domain Registrar > DNS Settings.
- Add a new record:
- Type: TXT
- Host/Name: @
- Value and TTL: Paste the code from Google.
- Save.
- Go back to Google and click Verify.
Congrats, it will take 5 minutes to 48 hours to verify your domain. Once done, move to Phase 4.
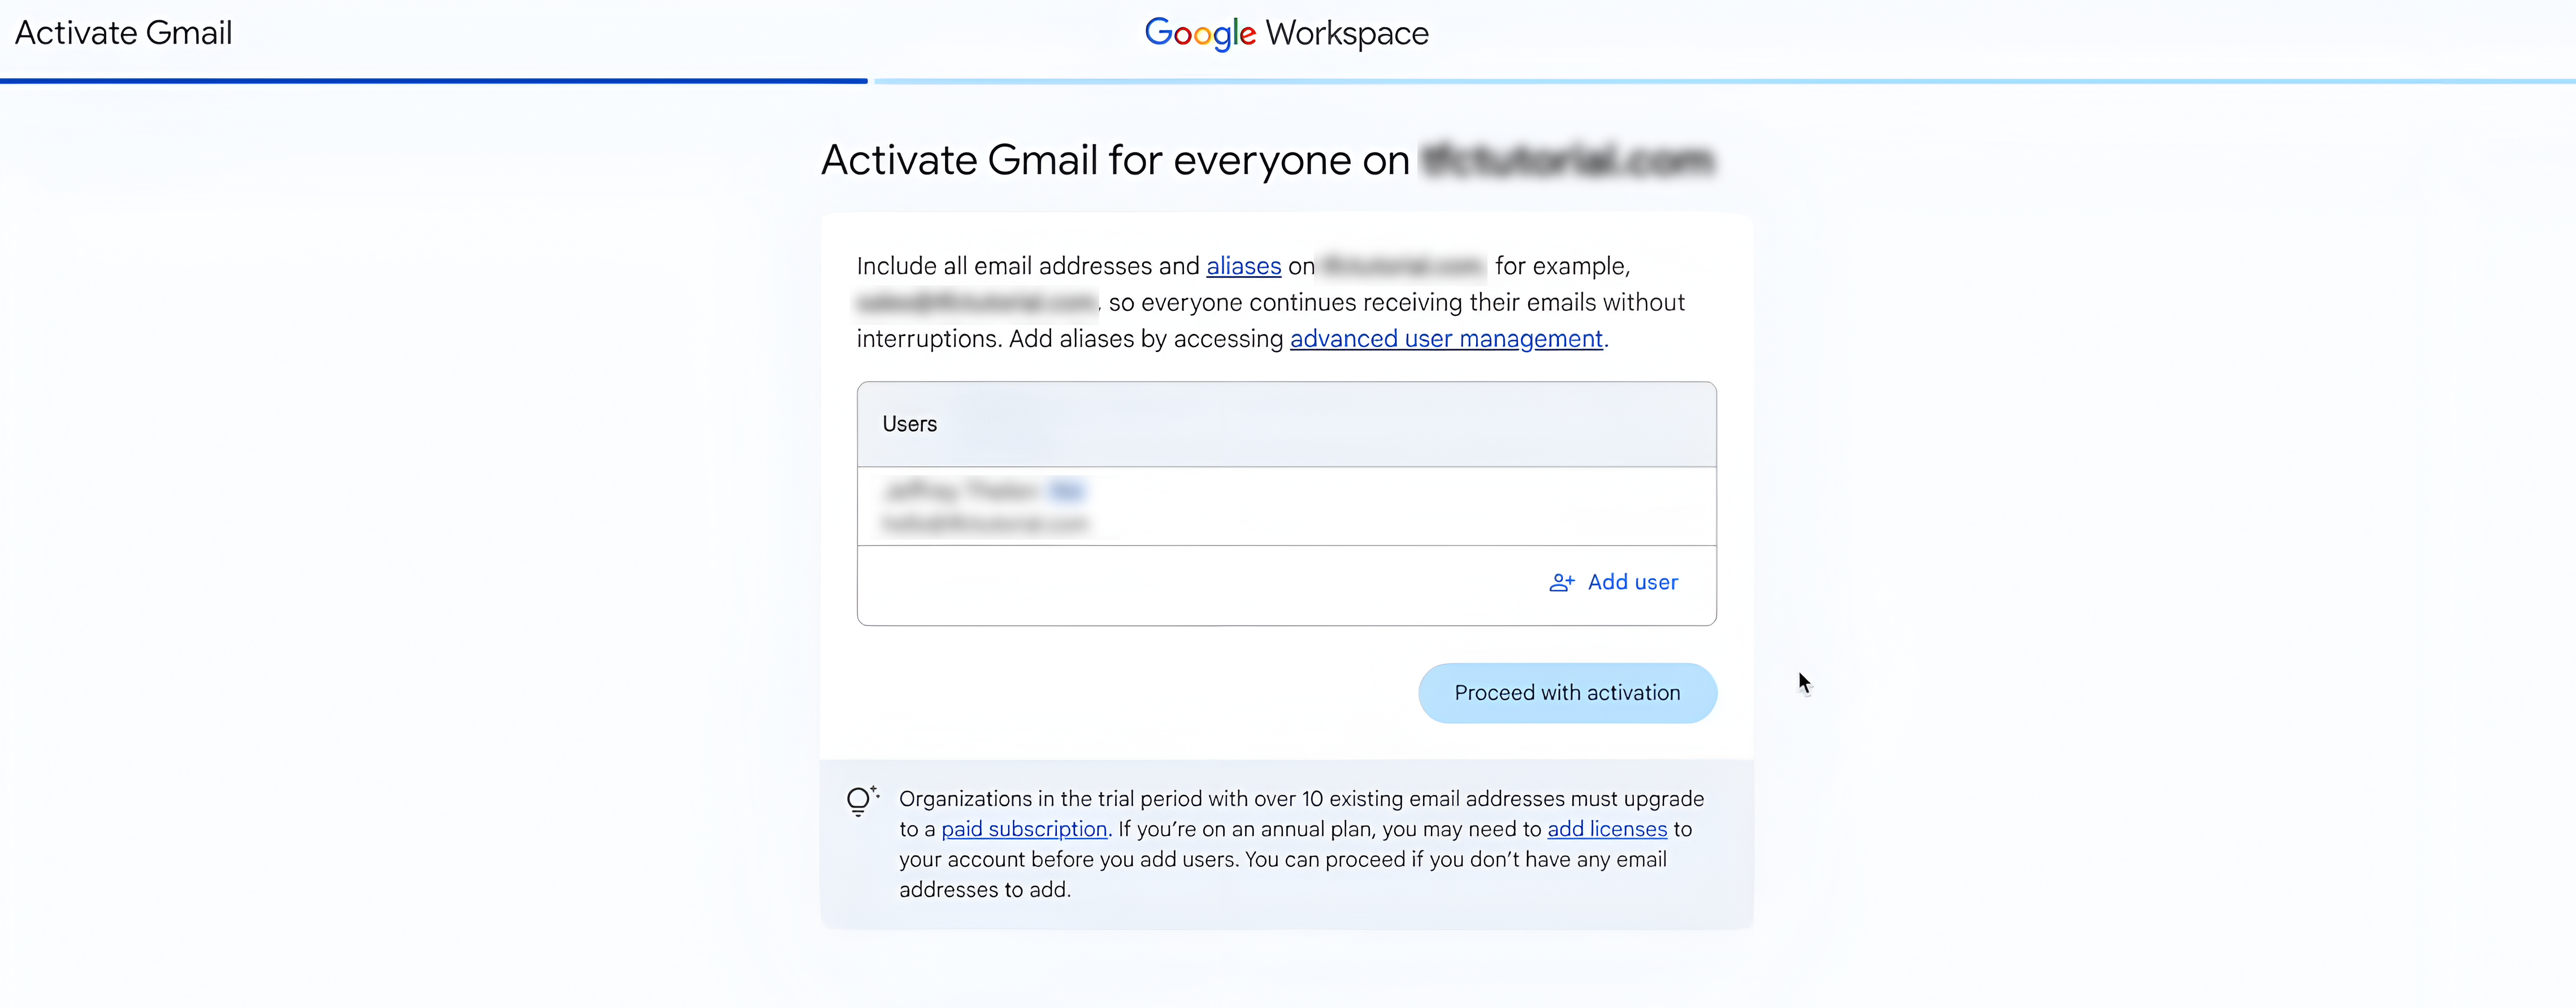
Phase 4: Activate MX records (Activate Gmail)
If you don't do this, you can send emails, but you won't receive them.
Automatically updating MX records:
- Click "Activate Gmail" button from the screen and click "Continue".
- Choose your domain host from the list and everything will be done automatcially.
Manually updating MX records:
If your domain host is not listed, select "My domain uses a different host" and follow below steps:
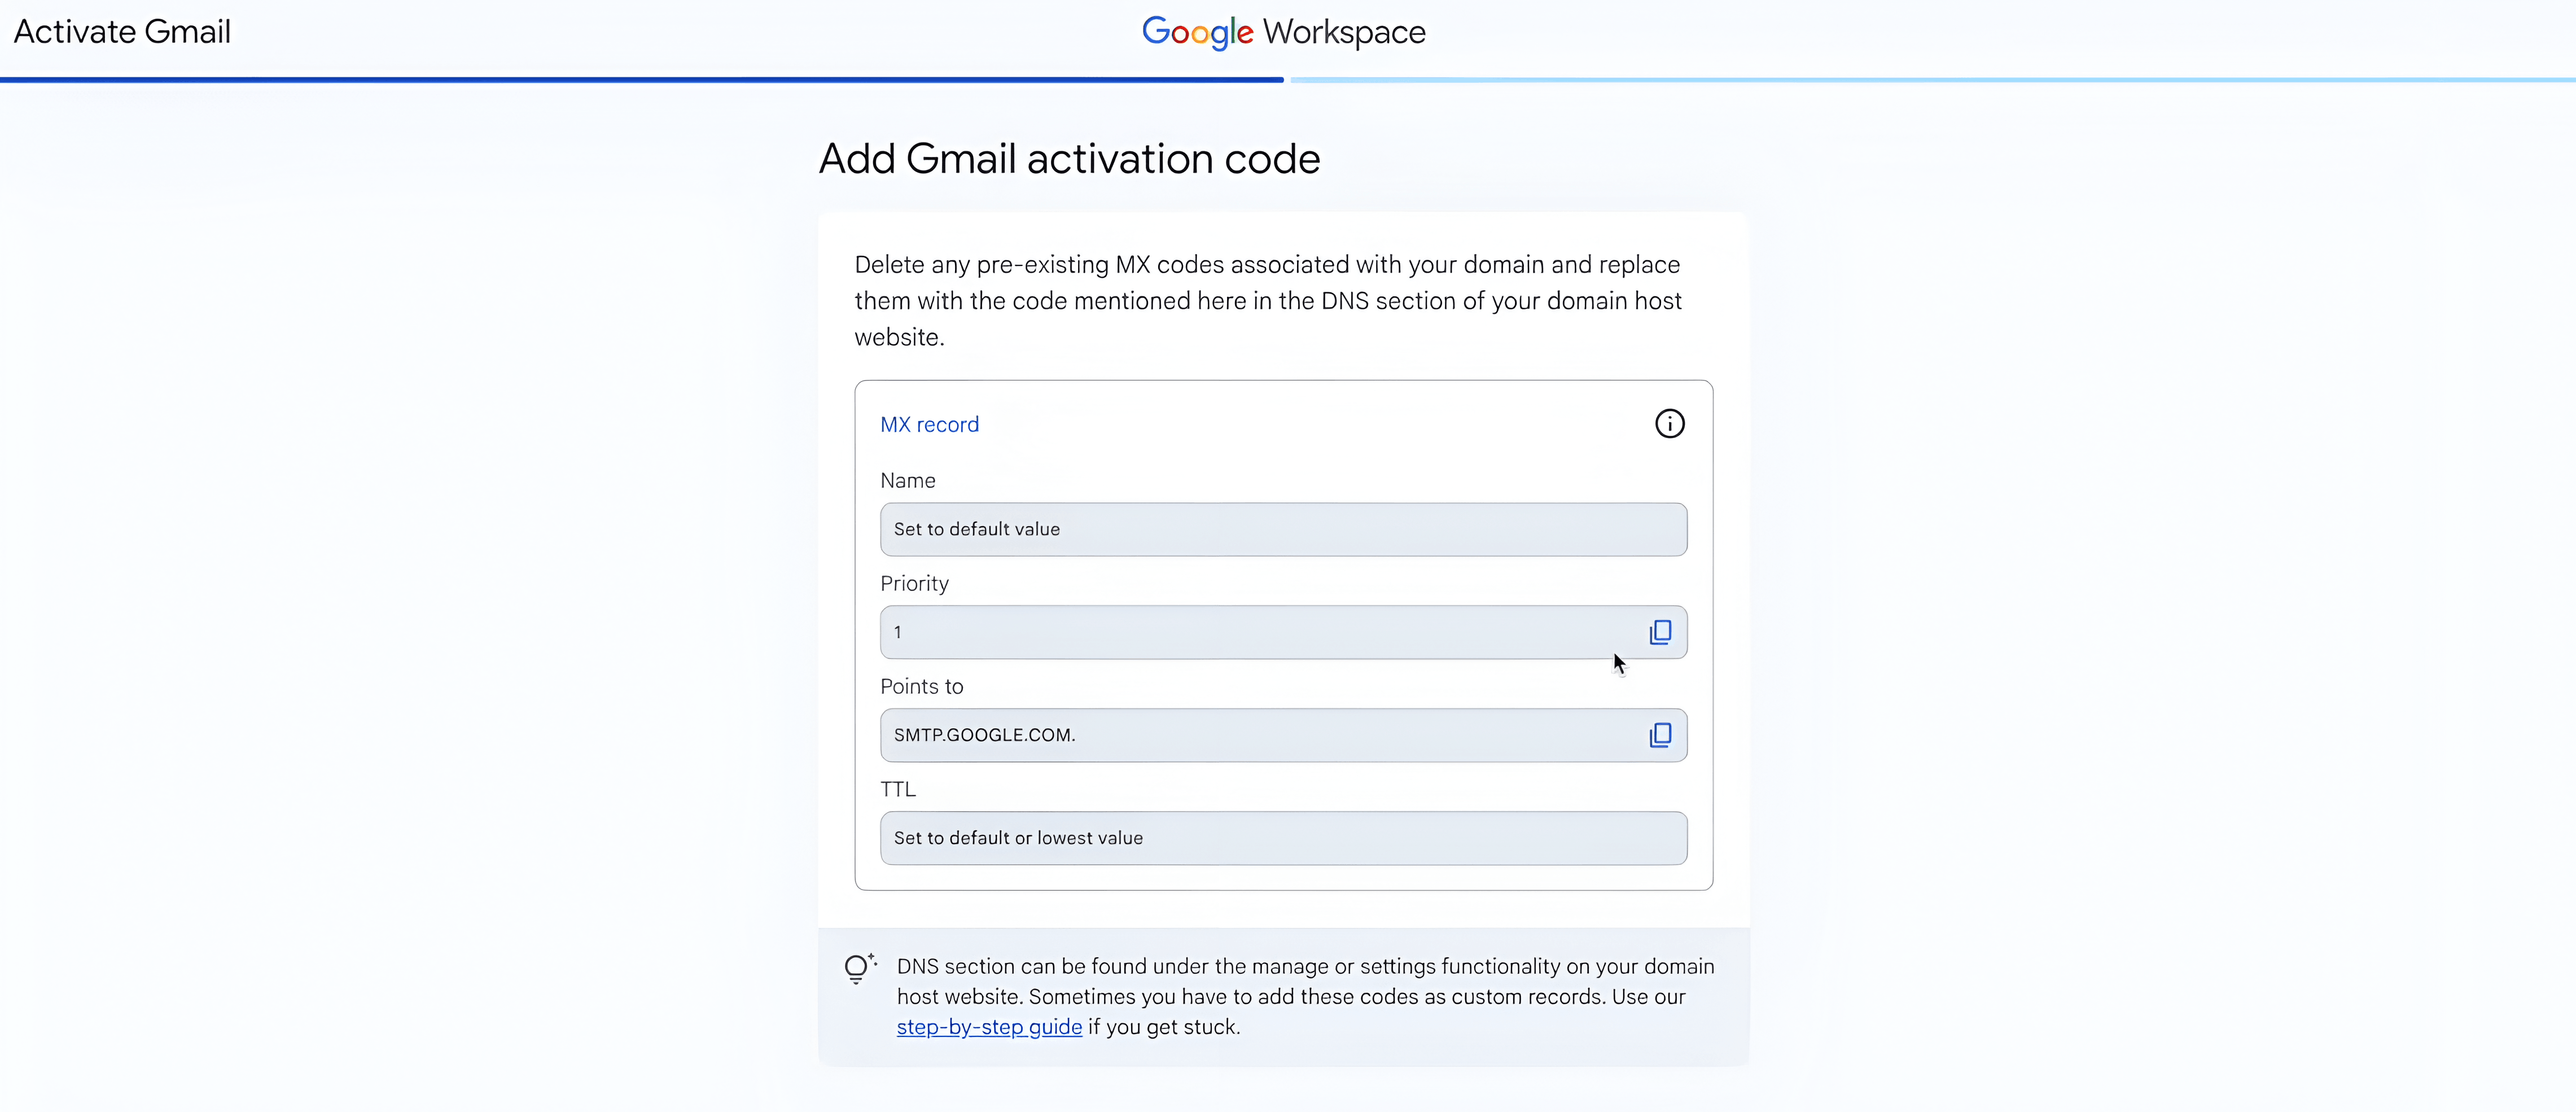
- In your Domain Registrar DNS settings, look for MX Records i.e (Name, Priority, Points to, TTL).
- Delete any existing MX records.
- Add the Google MX records manually (Google provides these on the setup screen).
Wait 5 minutes.
You are done.
Send a test email from your personal Gmail to your new business email. If it lands, you are live.
The "GWSave" Strategy
You are now professional. But you are also a business owner, which means you watch your margins.
Google Workspace prices creep up. Smart founders don't pay full retail if they don't have to.
Here is the move:
- Grab a Promo Code: We curate active codes at GWSave. usually 10% off for the first year.
- Pay Annually: If cash flow allows, switching to the annual plan usually saves you another ~16-20% compared to monthly.
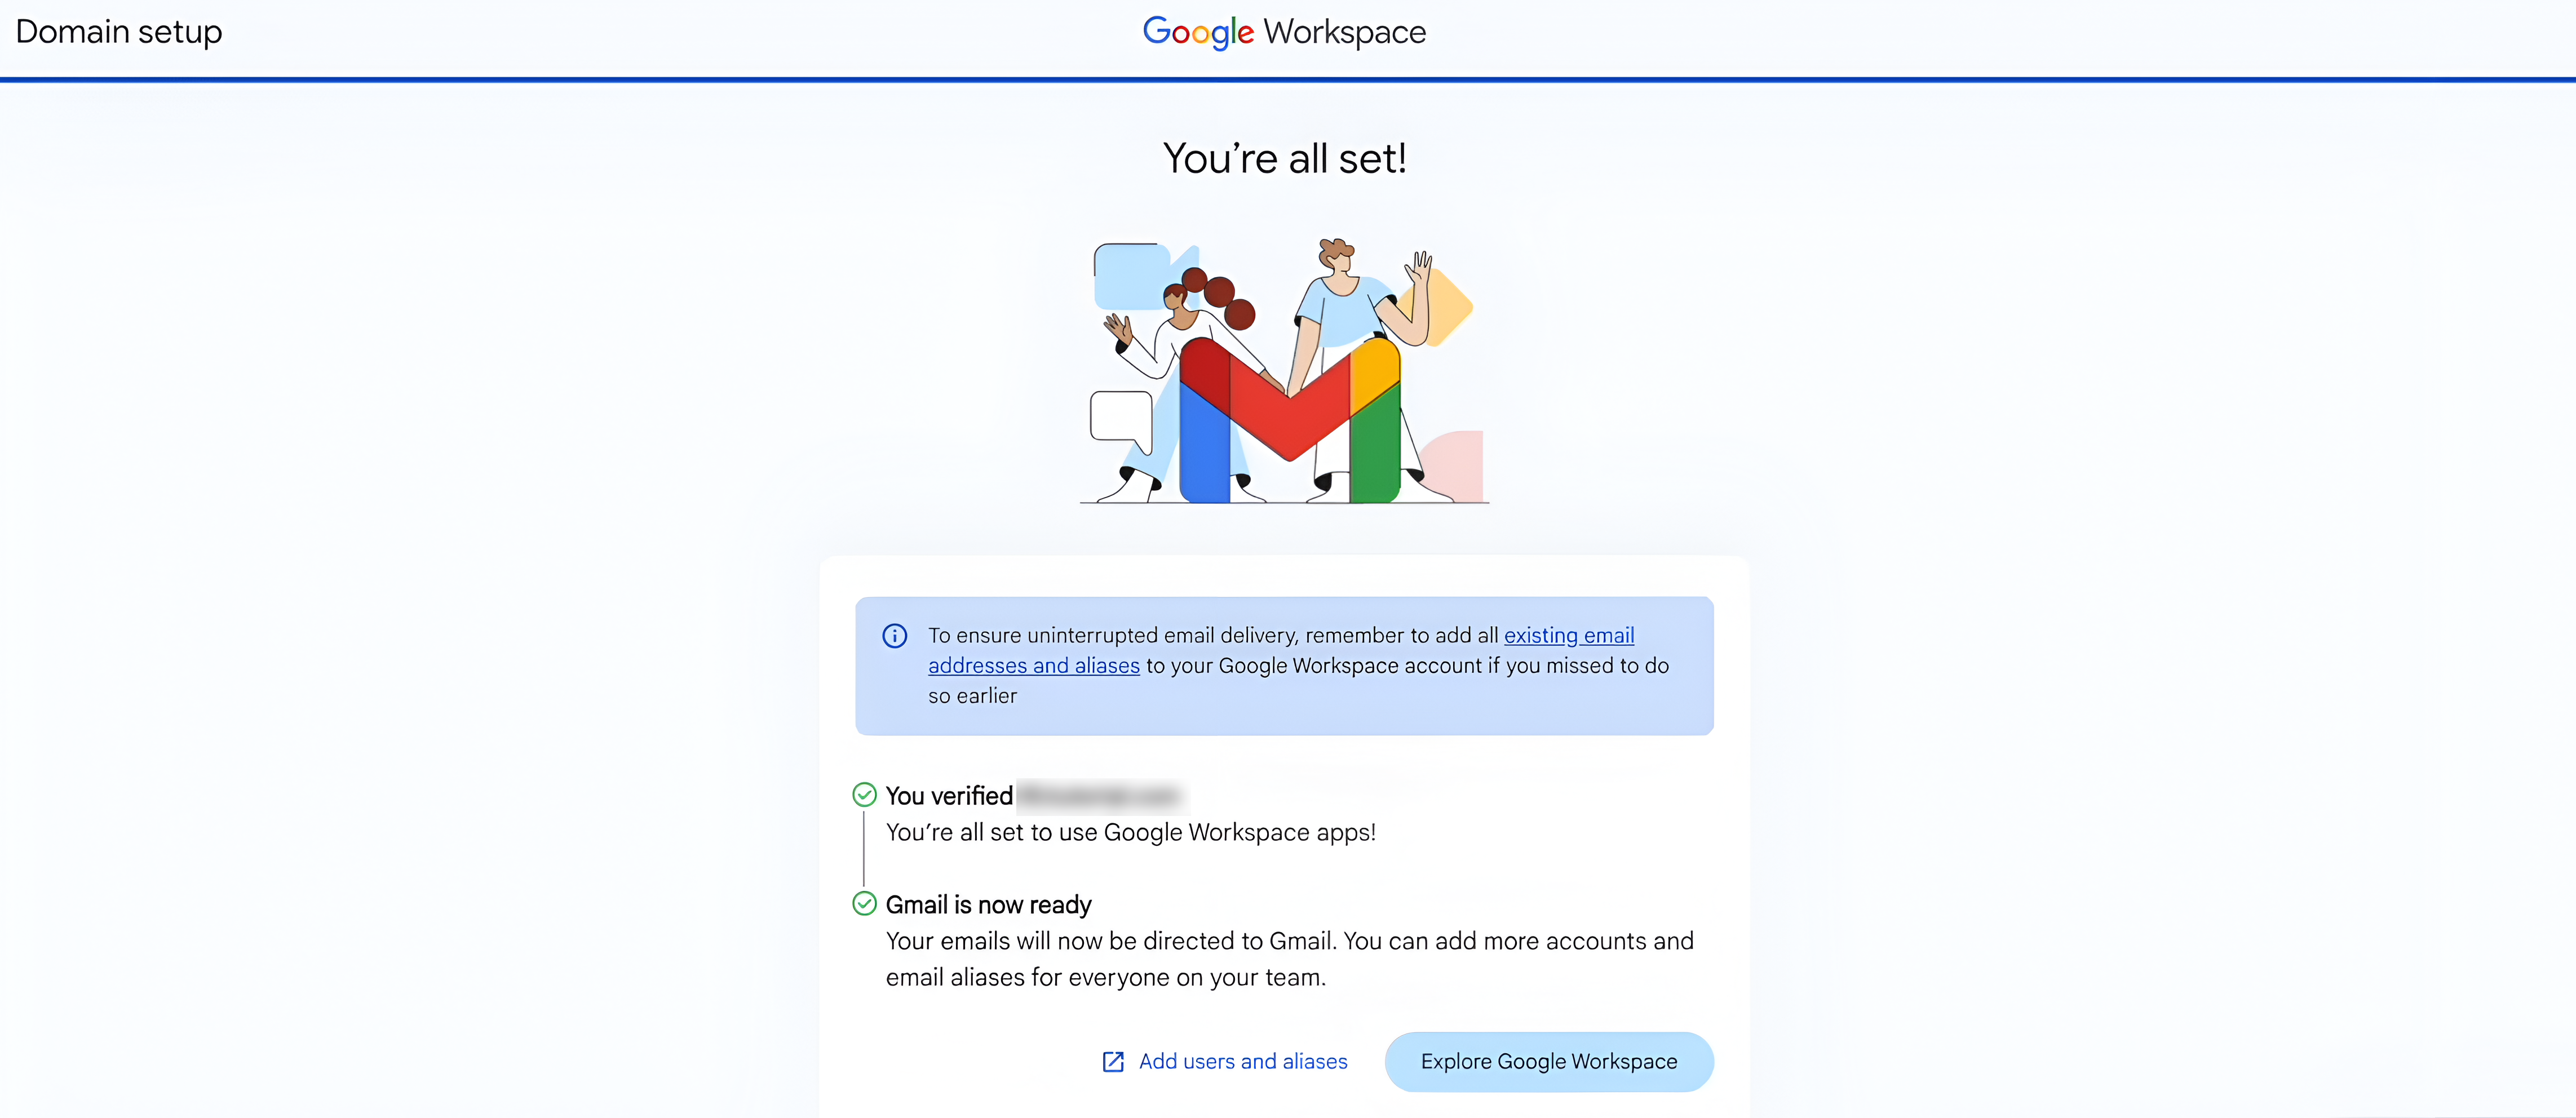
Total time: 15 Minutes. Total result: Instant Credibility.
Stop overthinking the tech. Build the business.